https://www.linuxer.name/posts/aws-ec2-root-volume-resize-extending-linux/
위에서 확장한 볼륨을 축소 할거다.
축소할 인스턴스의 OS 는 amazon linux 1 로 ext4 의 파일시스템을 가지고 있고 grub1을 사용한다. 따라서 아래 과정은 amazon linux 2 에 맞지 않는다.
볼륨 확장은 엄청 간단하다. 콘솔에서 늘리고 명령어 두줄이면 쨘! 근데..축소는? 축소는...?축소는!!!!!!! 간단하지 않다.
20G -> 5G 로 축소할거다. 가즈아!!!!!!!!!! 축소하기 위해선 먼저 준비물이 필요하다.
축소할 인스턴스의 루트 볼륨 스냅샷 위에서 만든 스냅샷으로 생성한 볼륨하나 루트볼륨을 복사할 볼륨 그리고 작업할 인스턴스. amazon linux 1
간략하게 설명하자면 현재 잘도는 인스턴스는 두고, 스냅샷으로 볼륨을 만들어서 다른 인스턴스에 연결한뒤에 거기서 축소...실은 복사 작업을 한뒤에 인스턴스 중지후 루트 볼륨 교체를 진행할거다. 그럼 볼륨을 먼저 생성하자.

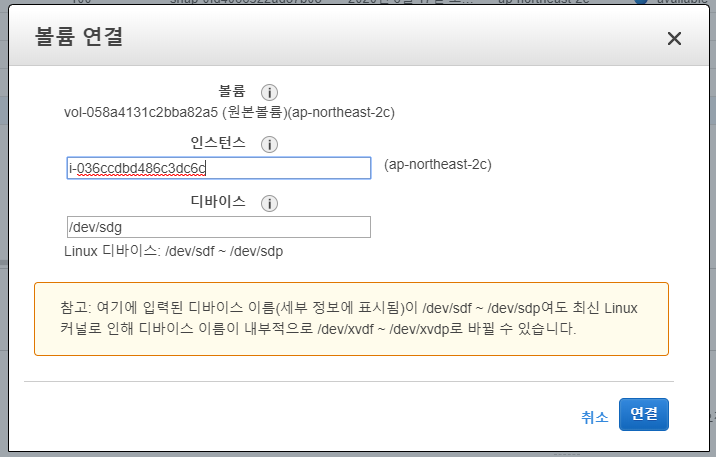
볼륨은 이런식으로 xvdf(new) / xvdg(org) 로 연결한다. 작업할 인스턴스는 amazon linux 1이다.
Disk /dev/xvda: 15 GiB, 16106127360 bytes, 31457280 sectors Units: sectors of 1 * 512 = 512 bytes Sector size (logical/physical): 512 bytes / 512 bytes I/O size (minimum/optimal): 512 bytes / 512 bytes Disklabel type: dos Disk identifier: 0x00000000 Device Boot Start End Sectors Size Id Type /dev/xvda1 2048 31457246 31455199 15G 83 Linux
Disk /dev/xvdf: 5 GiB, 5368709120 bytes, 10485760 sectors Units: sectors of 1 * 512 = 512 bytes Sector size (logical/physical): 512 bytes / 512 bytes I/O size (minimum/optimal): 512 bytes / 512 bytes
Disk /dev/xvfg: 20 GiB, 21474836480 bytes, 41943040 sectors Units: sectors of 1 * 512 = 512 bytes Sector size (logical/physical): 512 bytes / 512 bytes I/O size (minimum/optimal): 512 bytes / 512 bytes Disklabel type: gpt Disk identifier: ADC2A980-D341-46D7-9DA4-3652574FACDF Device Start End Sectors Size Type /dev/xvdg1 4096 41943006 41938911 20G Linux filesystem /dev/xvdg2 2048 4095 2048 1M BIOS boot
세개의 파티션이 연결된걸 확인할수 있다.
작업전에 먼저 복사 대상 볼륨에서 파티션을 만들고 파일시스템을 생성해준다. 아래스크린샷은 이해를 돕기위해 찍은것이다.
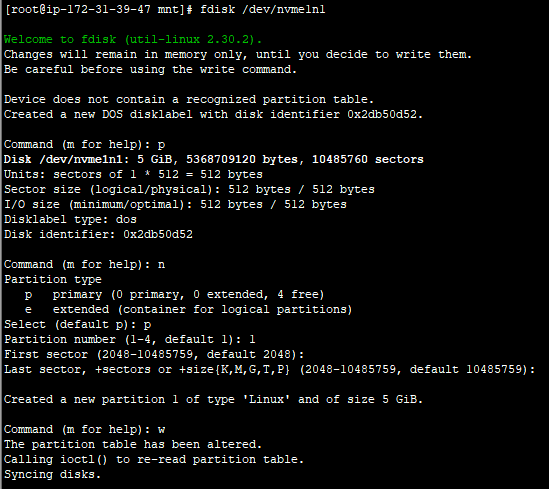
fdisk /dev/xvdf -> p (현재파티션확인) -> n(파티션생성) -> p(생성된 파티션확인) -> w(저장)
파티션을 만들었으면 linux dd 명령어로 복사해줘야한다.
아직 볼륨은 마운트하지 않은 상태에서 org 볼륨의 블럭사이즈를 확인해야 한다.
e2fsck -f /dev/xvdg1 명령어로 먼저 파일시스템을 체크한다.
[root@ip-172-31-12-119 mnt]# e2fsck -f /dev/xvdg1 e2fsck 1.43.5 (04-Aug-2017) Pass 1: Checking inodes, blocks, and sizes Pass 2: Checking directory structure Pass 3: Checking directory connectivity Pass 4: Checking reference counts Pass 5: Checking group summary information /: 40330/1310720 files (0.1% non-contiguous), 392822/5242363 blocks
[root@ip-172-31-12-119 mnt]# resize2fs -M -p /dev/xvdg1 resize2fs 1.43.5 (04-Aug-2017) Resizing the filesystem on /dev/xvdg1 to 461003 (4k) blocks. Begin pass 2 (max = 103395) Relocating blocks XXXXXXXXXXXXXXXXXXXXXXXXXXXXXXXXXXXXXXXX Begin pass 3 (max = 160) Scanning inode table XXXXXXXXXXXXXXXXXXXXXXXXXXXXXXXXXXXXXXXX Begin pass 4 (max = 4575) Updating inode references XXXXXXXXXXXXXXXXXXXXXXXXXXXXXXXXXXXXXXXX The filesystem on /dev/xvdg1 is now 461003 (4k) blocks long.
The filesystem on /dev/xvdg1 is now 461003 (4k) blocks long. 이부분에서 461003이게 현재 blockcount 다. 여기서 16MB 의 블럭사이즈를 계산해야 한다.
blockcount * 4 / (16 * 1024) 이렇게 계산해야 한다.
461003 * 4 / (16 * 1024) = 112.549560546875 로 계산되어 걍 올림해서 113이다. 이 16mb의 블록사이즈는 113개로...
dd bs=16M if=/dev/xvdg1 of=/dev/xvdf1 count=113 명령어로 블록단위 복사를 해줄거다.
[root@ip-172-31-12-119 mnt]# dd bs=16M if=/dev/xvdg1 of=/dev/xvdf1 count=113 113+0 records in 113+0 records out 1895825408 bytes (1.9 GB) copied, 29.3328 s, 64.6 MB/s [root@ip-172-31-12-119 mnt]# resize2fs -p /dev/xvdf1 resize2fs 1.43.5 (04-Aug-2017) Resizing the filesystem on /dev/xvdf1 to 1310464 (4k) blocks. The filesystem on /dev/xvdf1 is now 1310464 (4k) blocks long.
[root@ip-172-31-12-119 mnt]# resize2fs -p /dev/xvdf1 resize2fs 1.43.5 (04-Aug-2017) Resizing the filesystem on /dev/xvdf1 to 1310464 (4k) blocks. The filesystem on /dev/xvdf1 is now 1310464 (4k) blocks long.
[root@ip-172-31-12-119 mnt]# e2fsck -f /dev/xvdf1 e2fsck 1.43.5 (04-Aug-2017) Pass 1: Checking inodes, blocks, and sizes Pass 2: Checking directory structure Pass 3: Checking directory connectivity Pass 4: Checking reference counts Pass 5: Checking group summary information /: 40330/327680 files (0.2% non-contiguous), 329605/1310464 blocks
정상적으로 복사가되면 resize2fs 와 e2fsck 가 먹는다. 그럼 이제 거의 다왔다.
마운트할 디렉토리를 생성한다.
mkdir /mnt/new
mkdir /mnt/org
파티션을 마운트한다.
mount -t ext4 /dev/xvdf1 /mnt/new
mount -t ext4 /dev/xvdg1 /mnt/org
마운트 확인한다.
df -h Filesystem Size Used Avail Use% Mounted on devtmpfs 1.9G 0 1.9G 0% /dev tmpfs 1.9G 0 1.9G 0% /dev/shm tmpfs 1.9G 408K 1.9G 1% /run tmpfs 1.9G 0 1.9G 0% /sys/fs/cgroup /dev/xvda1 15G 13G 2.3G 86% / tmpfs 389M 0 389M 0% /run/user/1000 /dev/xvdf1 4.8G 20M 4.6G 1% /mnt/new /dev/xvdg1 20G 1.3G 19G 7% /mnt/org
정상적으로 마운트가 됬다.
amazon linux 의 path는 uuid 가 아니라 label 기반이므로 그냥 복사한 파티션에 label 을 붙여 준다. 붙여 줄 라벨은 / 다.
e2label /dev/xvdf1 /
라벨 지정이 완료 되었다면 blkid 를 이용해서 확인한다. 아래 화면은 이해를 돕기위한 내용이다.
blkid
/dev/xvda1: LABEL="/" UUID="781f875d-4262-4f01-ba72-d6bd123785f5" TYPE="ext4"
그리고 grub install 을 해줘야한다.
먼저 마운트를 해줘야 한다.
$cd /mnt/new
$ mount -B /dev dev
$ mount -B /proc /proc
$ mount -B /sys sys
$ chroot .
제일 중요한 부분은 /proc 부분이다. mount bind 해주지 않으면 정상적으로 파티션 포지션을 불러오지 않는다.
chroot 까지 정상적으로 마쳐 지면 이제 거의 다왔다. 그냥은 안되고 몇가지를 수정해줘야 한다. 근래에 사용하는 aws 의 HOST가 변경되어서 볼륨 포지션이 좀 변경되었기 때문이다. amazon linux 1 에서는 /boot/grub/device.map의 수정이 필요하다. 하이퍼 바이저가 디바이스를 호출하는 이름이 변경된것이므로 수정하지 않으면 grub-install 이 불가능하다.
전) device.map 이 없을수도 있다. 없으면 걍 만들어 줘도 괜찮다.
$cat /boot/grub/device.map
(hd0) /dev/sda
(hd1) /dev/sdf
(hd2) /dev/sdg
후)
$vi /boot/grub/device.map
(hd0) /dev/xdva
(hd1) /dev/xvdf
(hd2) /dev/xvfg
:wq!
변경을 완료하였다면 이제 grub-install 이 가능한 상태가 되었다.
grub-install /dev/xvdf
Installation finished. No error reported. This is the contents of the device map /boot/grub/device.map. Check if this is correct or not. If any of the lines is incorrect, fix it and re-run the script `grub-install'. (hd0) /dev/xvda (hd1) /dev/xvdf (hd2) /dev/xvdg
이제 복구를 위해만든 인스턴스를 종료한다.
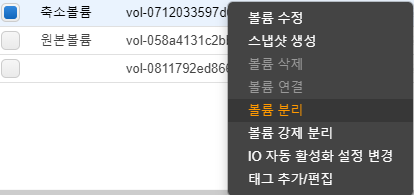
볼륨을 분리하면 정상적으로 분리가 된다. 이제 교체할 20G 볼륨인 인스턴스를 중지하고

원본 볼륨을 분리한다.


/dev/xvda 로 볼륨을 연결한다. 정상적으로 연결이 끝나면 인스턴스를 시작한다.
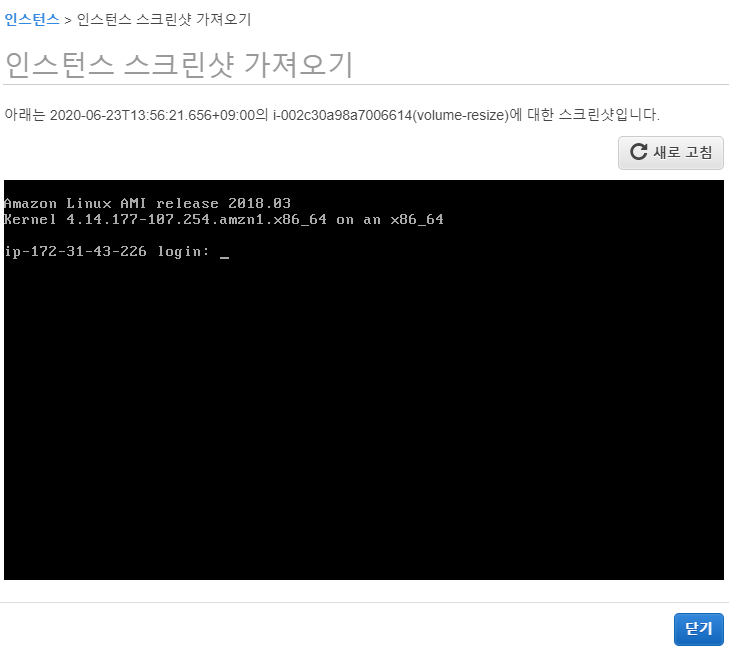
드디어 인스턴스가 떳다. 그럼 파티션을 확인해보자
[root@ip-172-31-43-226 ~]# df -h Filesystem Size Used Avail Use% Mounted on devtmpfs 483M 60K 483M 1% /dev tmpfs 493M 0 493M 0% /dev/shm /dev/xvda1 4.9G 1.3G 3.6G 27% /
정상적으로 파티션이 보이면 축소가 완료된것이다.
OS마다 방법이 다르지만 centos6 amazonlinux1 / centos7 amazonlinux2 이렇게 동일할것이다. 참고하자.
읽어주셔서 감사하다!
좋은하루 되시라!